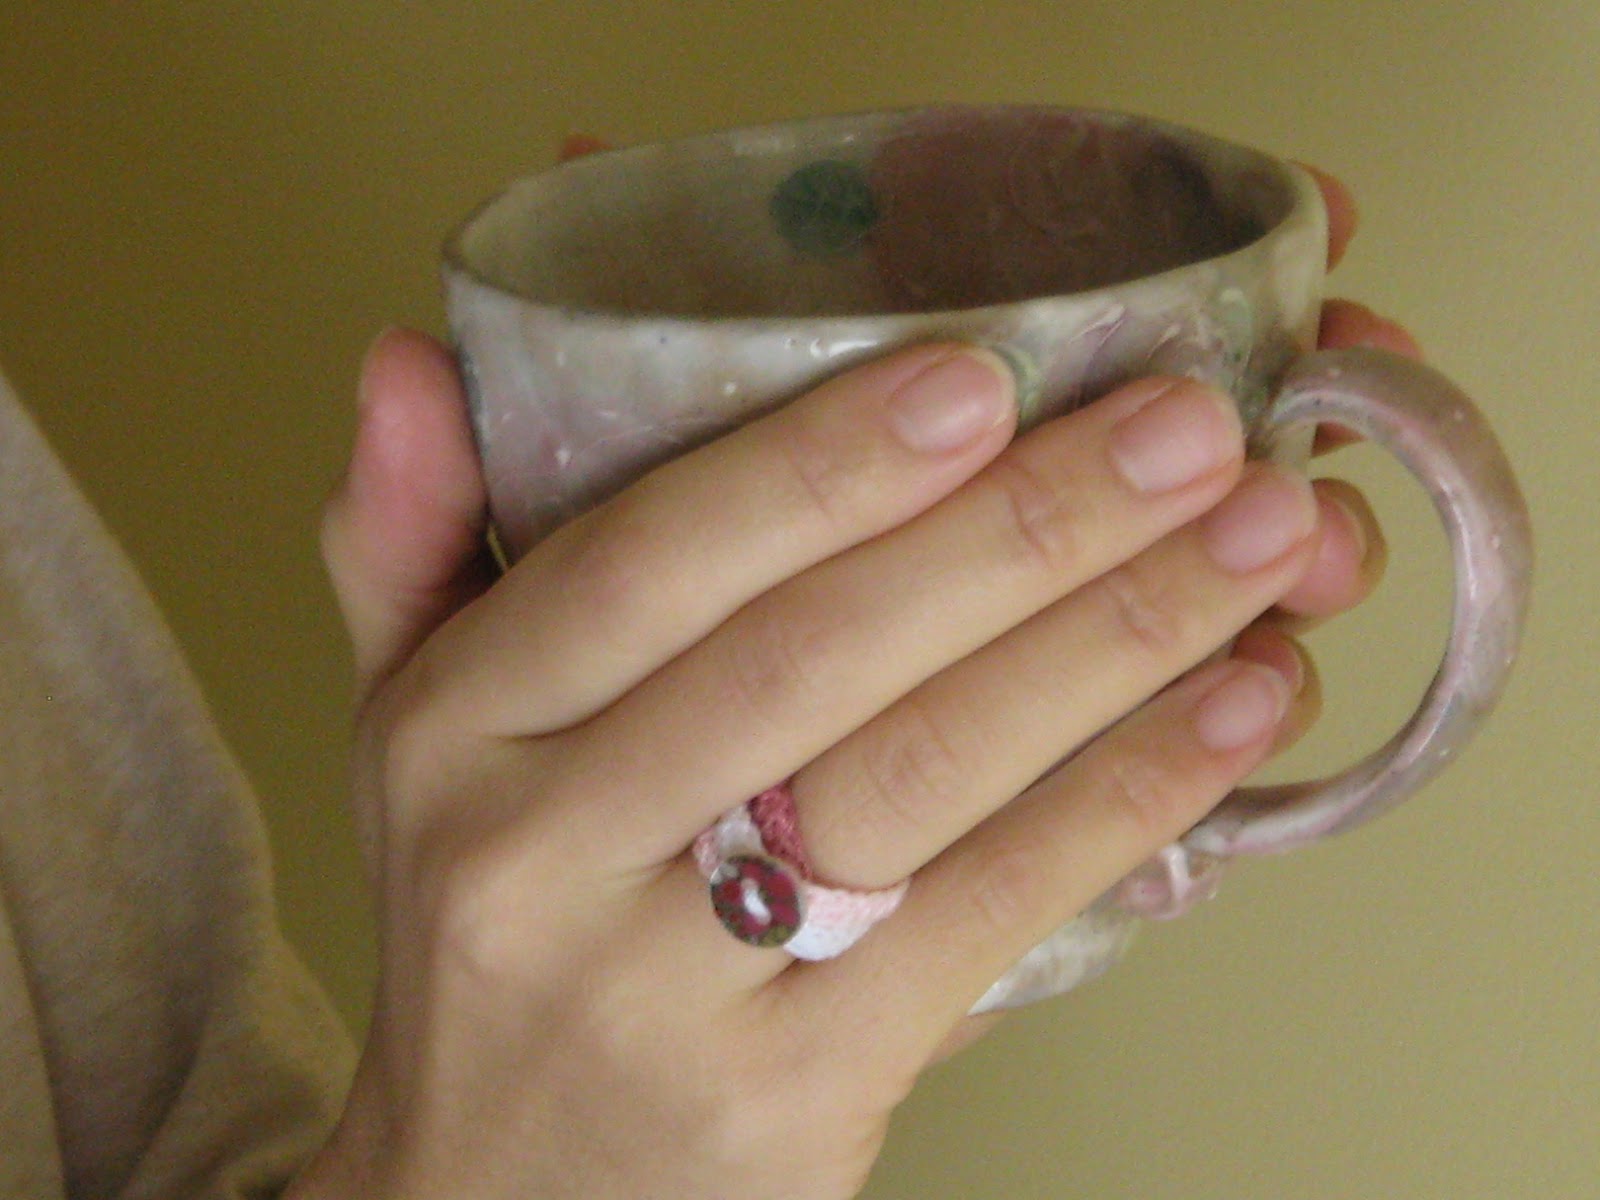
Hi everyone! I'm going to introduce you a small shelf curtain today.
This shelf is placed next to an island table in my kitchen. My friend gave me the shelf when she left the U.S before going back to Japan. I'm using the shelf to organize my kitchen tools on kitchen counter. However, the shelf is facing the front door, so I wanted to hide the item on the shelf from visitors.
I used a free afghan pattern for this curtain. You may get the pattern here.
This pattern is very easy. If you are a beginner, it's great pattern to practice crochet.
I used cotton and linen mixed yarn, so I can use the curtain in all seasons. To give the curtain a professional look, I blocked the top and bottom edges. That's why all points on the edges are beautifully pointing down. The blocking process takes overnight to completely dry, but it's worth it. If you don't know about blocking, you can learn about it here.
To make the curtain something original, I used brown ribbon on an edge. It's very easy to make something original! You just need an idea. :)
If you have any questions about the curtain, do not hesitate leave your comments. I'll answer you as fast as I can. Have a wonderful creating time!
Tuesday, April 1, 2014
Sunday, December 8, 2013
Baby Blanket
Hi there! It has been a long time since I last posted an article on my blog. I'm sorry about that. I had very busy days with many custom orders during the first half of this year, and my health had been bad for the second half of this year. Fortunately, I have mostly recovered. That's why I stared posting articles to my blog again. :)
During the second half of this year, I could have some free time to crochet. I'm going to introduce a baby blanket today!
I haven't crocheted any blankets until last year, this blanket is the second I have ever made. :) My first blanket was baby blanket too. I made it for my friend in Japan, but I forgot to take a picture of it...
My second cousin in Japan gave a birth to her daughter last October, so I made this blanket for her. I designed the blanket. The blanket is composed of 25 granny squares and edging.
This granny square is very simple pattern. I assume that you have seen or tried the pattern before. It's simple, but makes blanket beautiful if you connect a lot of the granny squares! This edging is called Aragon Crossed Edging. It contains a few complicated stitches.
To make the blanket special for my cousin, I added four Mickey Mouse motifs into the blanket! She LOVES Disney!! I knew that she was preparing baby items which had Mickey Mouse printed on them. I hope she will love the blanket. (This Mickey Mouse granny square is my original pattern.)
Update 9/23/2014
I made one more different colored Micky blanket. I changed the pattern a little bit.
Tuesday, January 1, 2013
Short sleeve bolero
Happy New Year to all!! This holiday shopping season, I found a wonderful bolero on my favorite Etsy shop. She knits and crochet. I sometimes use her ideas to make my own crochet clothes. The bolero was knit, so I decided to make one for myself by crochet. :) I had been working on my bolero at the end of last year, and I'm going to introduce you the bolero today!!
I love to crochet bolero, because bolero patterns are easy and bolero looks fancy. I've made a summer bolero before, so I wanted to make winter bolero.
I made the bolero's sleeves short because I wanted to wear the bolero underneath a winter coat. Crocheted/knitted long sleeve are sometimes too tight under a coat.
I used a pattern called Diamond Cross Trellis for my back. It's a beautiful pattern, but it is difficult to make.
To make a collar, I worked 2 back post double crochet and 4 front post double crochet repeatably on the edge.
I love to crochet bolero, because bolero patterns are easy and bolero looks fancy. I've made a summer bolero before, so I wanted to make winter bolero.
I made the bolero's sleeves short because I wanted to wear the bolero underneath a winter coat. Crocheted/knitted long sleeve are sometimes too tight under a coat.
I used a pattern called Diamond Cross Trellis for my back. It's a beautiful pattern, but it is difficult to make.
To make a collar, I worked 2 back post double crochet and 4 front post double crochet repeatably on the edge.
Saturday, December 1, 2012
Christmas giveaway winner
Hi everyone! I'm exited to announce the winner of the Christmas giveaway today. :) This is the first time I have held a giveaway. I received 12 valid entries. I held the giveaway for my past customers this time, but the entries were fewer than I had expected. However, I'm thankful for all of the participants in the giveaway!!
The winning number is 7
I'm going to send you an e-mail!
I hope you will like the coaster set. :)
The winning number is 7
Congratulation, Saki !!!!
I hope you will like the coaster set. :)
I'm planing to hold another giveaway when my shop has it's 100th sale. ( The shop has had 75 sales now, so it will be soon.) I'll also accept entries from whoever wants to participate, not just my past customers. :) What I'm going to give away, next time, will be a new project. I hope that a lot of people will participate.
Monday, November 5, 2012
Christmas giveaway!!!
Hi everyone, I have a big news today. :) I'm going to hold Christmas giveaway!!! A lot of customers purchased at my shop. My customers always gave me great ideas, and increased my crochet skill. I also had lovely conversations with them. I'm very thankful for my customers.
This giveaway is for my customers only this time, so participants must be those who have purchased at least one item on my shop or in person. I've also sent an invitation about the giveaway to my customers. If I get your reply for participating, I'll give you a number.
Even if you haven't purchased anything on my shop yet, it's not too late. I'll wait until November. 30th. If you will purchase by the day, you will get an invitation. :)
What I'm going to give away is...
It's a snowflake coaster set! I used thick Linen and corduroy fabric for winter coasters. These coasters can be an ornament too. I attached a cotton fabric hoop to the edge of each coaster.
The coasters are machine washable. However, I recommend using a laundry net. The snowflake doilies are appliqued to the coasters, so it won't lose it's shapes after washing.
Giveaway details.
1. Term : November. 5th ~ November. 30th. I'll drew a person on December. 1st, and inform the winner by e-mail. I hope that the winner will receive the coaster set before Christmas.
2. You must be who have purchased at least one item on my shop or in person.
3. You are not participant until you get a number from me, so please sent me your reply.
4. Please just send me your reply to enter!
Options
1. If you click "like" and write your comment on shop's face book, I'll give you one more number.
( If you are already a fan of my shop, just write your comment.)
2. If you will be a follower of my blog, and write your comment. I'll give you one more number.
( If you are already a follower, just write your comment.)
You may enter the giveaway a maximum of three times!!
I hope that a lot of my customers will participate in the giveaway.
Good luck!!
This giveaway is for my customers only this time, so participants must be those who have purchased at least one item on my shop or in person. I've also sent an invitation about the giveaway to my customers. If I get your reply for participating, I'll give you a number.
Even if you haven't purchased anything on my shop yet, it's not too late. I'll wait until November. 30th. If you will purchase by the day, you will get an invitation. :)
What I'm going to give away is...
The coasters are machine washable. However, I recommend using a laundry net. The snowflake doilies are appliqued to the coasters, so it won't lose it's shapes after washing.
Giveaway details.
1. Term : November. 5th ~ November. 30th. I'll drew a person on December. 1st, and inform the winner by e-mail. I hope that the winner will receive the coaster set before Christmas.
2. You must be who have purchased at least one item on my shop or in person.
3. You are not participant until you get a number from me, so please sent me your reply.
4. Please just send me your reply to enter!
Options
1. If you click "like" and write your comment on shop's face book, I'll give you one more number.
( If you are already a fan of my shop, just write your comment.)
2. If you will be a follower of my blog, and write your comment. I'll give you one more number.
( If you are already a follower, just write your comment.)
You may enter the giveaway a maximum of three times!!
I hope that a lot of my customers will participate in the giveaway.
Good luck!!
Tuesday, October 16, 2012
A pair of Neck Warmers
Hi everyone! I'm back from Japan. I went back to Japan to attend my friend's wedding. The wedding was wonderful. I'm so happy for her. After I came back home, I caught a cold and had high fever of 102 degrees. It was third time to have high fever this year... However, I feel better now. :)
Today, I'm going to introduce a pair of neck warmers that I made for our weeding anniversary. I think that men are kind of ashamed to wear crocheted/knitted clothes especially clothes that their partners made. To improve that problem, I made quit different designed warmers for my husband and me. However, I used same stitch to make similarity between the warmers.
For the first, I'll explain about my neck warmer.
It's easy to make this tube type warmer. Since I wanted to use basketweave stitch, I needed to make rectangle shape, and sewed both sides together to make it tube shape.
To make the warmer more original, I made a removable necklace with leather strings and crocheted flowers.
Next, my husband's neck warmer.
How to make this type of warmer is mostly same as tube type warmer. Make thinner rectangle than tube type, and add a loop for a button at proper place on a side. I attached a coconut button to the warmer.
Why I made scarf type warmer for him is that he can wear the warmer underneath his jacket like this picture.
The weather is getting cold. I hope that you all started enjoying crochet. I also hope that you will make someone warm with your crocheted item. :)
Yarn that I used for the neck warmers.
Baby Bee Sweet Delight Baby : Teddy color
This yarn has extremely soft texture, and was smooth to crochet. Unfortunately, this yarn doesn't have many color variation.
Today, I'm going to introduce a pair of neck warmers that I made for our weeding anniversary. I think that men are kind of ashamed to wear crocheted/knitted clothes especially clothes that their partners made. To improve that problem, I made quit different designed warmers for my husband and me. However, I used same stitch to make similarity between the warmers.
For the first, I'll explain about my neck warmer.
It's easy to make this tube type warmer. Since I wanted to use basketweave stitch, I needed to make rectangle shape, and sewed both sides together to make it tube shape.
To make the warmer more original, I made a removable necklace with leather strings and crocheted flowers.
Next, my husband's neck warmer.
How to make this type of warmer is mostly same as tube type warmer. Make thinner rectangle than tube type, and add a loop for a button at proper place on a side. I attached a coconut button to the warmer.
Why I made scarf type warmer for him is that he can wear the warmer underneath his jacket like this picture.
The weather is getting cold. I hope that you all started enjoying crochet. I also hope that you will make someone warm with your crocheted item. :)
Yarn that I used for the neck warmers.
Baby Bee Sweet Delight Baby : Teddy color
This yarn has extremely soft texture, and was smooth to crochet. Unfortunately, this yarn doesn't have many color variation.
Sunday, August 19, 2012
Crocheted mini pouch
Hi everyone! I'm going to introduce a mini pouch today. :) I'm actually selling these mini pouches on my Etsy shop, but I made a new designed mini pouch for my sister as a her birthday present.
This pouch can hold an iPhone, smart phone, cell phone, compact digital camera and whatever you prefer. I wanted a picture of the pouch with cell phone, but I don't have a cell phone... However, I made sure that the pouch size is large enough for iPhone at a shop.
The pouch is attachable to your bags.
Since I love to use wooden buttons, shell or coconut in my projects, I used coconut buttons for the pouch. It's not easy to get simple, natural and fine designed buttons, so I mostly order those buttons from online shops. :)
To make the pouch for an adult lady, I made a connected motifs applique with Natural colored cotton crochet thread. I also selected Fudge Brown color for the straps.
This is back side of the pouch.
I'm not selling this designed crochet mini pouch on my Etsy shop so far. However, please feel free to contact me if you are interested in purchasing. I'm also happy to make the pouch in different colors or create even new design for you. You may contact me on my shop, NeIro, or send me an e-mail from this blog.
I actually gave a different designed crochet mini pouch to my friend as a her birthday present. She was really pleased to have it, because she was thinking of buying a new smart phone for herself. :)
I'll leave links of other designed mini pouch here just in case.
Crocheted Linen Mini Poush : Rose
Crocheted Linen Mini Pouch : Red Bird
Have a wonderful crochet time!!
This pouch can hold an iPhone, smart phone, cell phone, compact digital camera and whatever you prefer. I wanted a picture of the pouch with cell phone, but I don't have a cell phone... However, I made sure that the pouch size is large enough for iPhone at a shop.
The pouch is attachable to your bags.
Since I love to use wooden buttons, shell or coconut in my projects, I used coconut buttons for the pouch. It's not easy to get simple, natural and fine designed buttons, so I mostly order those buttons from online shops. :)
To make the pouch for an adult lady, I made a connected motifs applique with Natural colored cotton crochet thread. I also selected Fudge Brown color for the straps.
This is back side of the pouch.
I'm not selling this designed crochet mini pouch on my Etsy shop so far. However, please feel free to contact me if you are interested in purchasing. I'm also happy to make the pouch in different colors or create even new design for you. You may contact me on my shop, NeIro, or send me an e-mail from this blog.
I actually gave a different designed crochet mini pouch to my friend as a her birthday present. She was really pleased to have it, because she was thinking of buying a new smart phone for herself. :)
I'll leave links of other designed mini pouch here just in case.
Crocheted Linen Mini Poush : Rose
Crocheted Linen Mini Pouch : Red Bird
Have a wonderful crochet time!!
Monday, July 9, 2012
Gift Basket
Hi everyone! Are you enjoying summer? Kentucky, where I live, is very hot these days. It's mostly over 100F here. I have been having busy days working on custom orders, so it has been a while since I have posted a new article.
From July through August, I have three people for who I want to make birthday presents. Today, I'm going to introduce one of their birthday presents that I made.
This present is for my mother. :) She is great at sewing and knitting!! I wanted to make something that would make her craft time more fun.
This gift basket includes four crochet laces, eight mini motifs and six crocheted flowers. To wrap these items, I used the basket, and decorated with the crochet ribbon. :)
You may check these items on my shop. Some of them are not sold at my shop though. I'll write links here.
Motif applique set
Crochet lace : Small shell
Crochet lace : Leaves
Crochet lace : Fine shell
Crochet- ace : Spiral shell
Crochet ribbon : Picot with white ribbon
It's more fun to create something original with sewing supplies than just buying completed items!!!
Have fun with your projects. :)
From July through August, I have three people for who I want to make birthday presents. Today, I'm going to introduce one of their birthday presents that I made.
This present is for my mother. :) She is great at sewing and knitting!! I wanted to make something that would make her craft time more fun.
This gift basket includes four crochet laces, eight mini motifs and six crocheted flowers. To wrap these items, I used the basket, and decorated with the crochet ribbon. :)
You may check these items on my shop. Some of them are not sold at my shop though. I'll write links here.
Motif applique set
Crochet lace : Small shell
Crochet lace : Leaves
Crochet lace : Fine shell
Crochet- ace : Spiral shell
Crochet ribbon : Picot with white ribbon
It's more fun to create something original with sewing supplies than just buying completed items!!!
Have fun with your projects. :)
Tuesday, March 13, 2012
Crochet spring one-piece for stuffed animal
Hi, everyone! Kentucky, where I live, is very warm today. It's supposed to reach 76 degrees!!! I'm so happy to see my flower's growth in my yard. :)
Today, I'm going to introduce crochet spring one-piece for stuffed animal (doll dress).
I have introduced different clothes in my blog before. However, It was for my stuffed bear. This time, I made the one-piece for my elder sister's friend's daughter. My sister asked me to present the one-piece as a gift. She wanted a sleeveless pink one-piece with blue ribbon on it's breast. I made the one-piece with pink cotton yarn and attached trim made with white mercerized cotton crochet thread to the neckline and edge of the skirt.
This bear (mine) is called Duffy. It's a Disney character. There is Duffy's girl friend called Shellie May. The bears come in different sizes. This one is about 5 inches tall. There is another bear that is 17 inches tall. I have a 5 inch tall Duffy and a 17 inch tall Shellie May. :) I made the one-piece for 5 inches Shellie May.
Duffy and Shellie May fans in Japan love to dress them with special clothes to show off!! Of course, various clothes are selling in Tokyo Disney Sea. Enthusiastic fans make their clothes by themselves.
I'm not sure if we can buy the stuffed bears at Disney world in the U.S. I have red on a website that Disney World in the U.S made Duffy and Duffy went over to Japan though. Anyway, I'm sure we can buy the bears on Amazon.
When I ship orders from my shop, I always wrap them to ship. I'm a buyer who enjoys online shopping. When I receive my purchases without any sellers care, I'm so sad. That's why I wrap any orders to ship. :) I also take present wrapping, when my customers prefer.
Have a wonderful crochet time!!!
Today, I'm going to introduce crochet spring one-piece for stuffed animal (doll dress).
I have introduced different clothes in my blog before. However, It was for my stuffed bear. This time, I made the one-piece for my elder sister's friend's daughter. My sister asked me to present the one-piece as a gift. She wanted a sleeveless pink one-piece with blue ribbon on it's breast. I made the one-piece with pink cotton yarn and attached trim made with white mercerized cotton crochet thread to the neckline and edge of the skirt.
This bear (mine) is called Duffy. It's a Disney character. There is Duffy's girl friend called Shellie May. The bears come in different sizes. This one is about 5 inches tall. There is another bear that is 17 inches tall. I have a 5 inch tall Duffy and a 17 inch tall Shellie May. :) I made the one-piece for 5 inches Shellie May.
Duffy and Shellie May fans in Japan love to dress them with special clothes to show off!! Of course, various clothes are selling in Tokyo Disney Sea. Enthusiastic fans make their clothes by themselves.
I'm not sure if we can buy the stuffed bears at Disney world in the U.S. I have red on a website that Disney World in the U.S made Duffy and Duffy went over to Japan though. Anyway, I'm sure we can buy the bears on Amazon.
When I ship orders from my shop, I always wrap them to ship. I'm a buyer who enjoys online shopping. When I receive my purchases without any sellers care, I'm so sad. That's why I wrap any orders to ship. :) I also take present wrapping, when my customers prefer.
Have a wonderful crochet time!!!
Sunday, February 12, 2012
Crochet ring & motif necklace
It's a sunny day here today. We have been having rainy days on and off, so I was waiting for the sun to take pictures of my shop items and blog items.
I'm going to introduce crochet rings and motif necklace today!
I made these accessories for myself. It's very easy to make. I love buttons made from wood, shell and coconut. I also love materials such as leather and pottery charms. I used these materials to make the accessories this time. :)
The first, I'll tell you about the rings. These rings are composed of three connected crochet rings and a button. I made a ring with foundation single crochet. You just make first ring. When you make second ring, you need to insert second foundation single crochet into first ring, and form second ring. When you make third ring, you need to insert third foundation single crochet into connected first and second rings, and form third ring. I attached my favorite buttons as settings. :)
Next, crochet motif necklace. Using crochet motif as a necklace charm is actually my elder sister's idea! She is learning pottery making. When I visited her two years ago, she was wearing a necklace used crochet motif and small pottery charm that she made. She is also interested in Japanese traditional potteries. She gave this charm made in Shigaraki ware to me.
I made the beige colored motif with crochet cotton thread, and made the red brown colored motif with floss!! Even if I use crochet cotton thread, most motifs come out too large for necklace charms. That's why I came up with crocheting with floss. It's not easy though. However, changing yarn or thread thickness is good way for making item size smaller or larger. I would love to use jeans or fleece to make doily foot mat sometime. :)
Just in case, I'm selling a small crochet motif set in my Etsy shop. If you are interested in it, please come visit! I'm not selling these accessories, but if you are interested in them, just contact me. I'm always happy to fill custom orders and share my skill. :)
Have a wonderful crochet time♪
I'm going to introduce crochet rings and motif necklace today!
I made these accessories for myself. It's very easy to make. I love buttons made from wood, shell and coconut. I also love materials such as leather and pottery charms. I used these materials to make the accessories this time. :)
The first, I'll tell you about the rings. These rings are composed of three connected crochet rings and a button. I made a ring with foundation single crochet. You just make first ring. When you make second ring, you need to insert second foundation single crochet into first ring, and form second ring. When you make third ring, you need to insert third foundation single crochet into connected first and second rings, and form third ring. I attached my favorite buttons as settings. :)
Next, crochet motif necklace. Using crochet motif as a necklace charm is actually my elder sister's idea! She is learning pottery making. When I visited her two years ago, she was wearing a necklace used crochet motif and small pottery charm that she made. She is also interested in Japanese traditional potteries. She gave this charm made in Shigaraki ware to me.
I made the beige colored motif with crochet cotton thread, and made the red brown colored motif with floss!! Even if I use crochet cotton thread, most motifs come out too large for necklace charms. That's why I came up with crocheting with floss. It's not easy though. However, changing yarn or thread thickness is good way for making item size smaller or larger. I would love to use jeans or fleece to make doily foot mat sometime. :)
Just in case, I'm selling a small crochet motif set in my Etsy shop. If you are interested in it, please come visit! I'm not selling these accessories, but if you are interested in them, just contact me. I'm always happy to fill custom orders and share my skill. :)
Have a wonderful crochet time♪
Subscribe to:
Posts (Atom)